CAGD 112 E-Portfolio
Flipbook:
The main goal of the flipbook assignment was to make a movie while taking pictures only, not filming. The final film had to be in 3 to 10 frames per second, so I decided to do it in 6.5 frames. I gathered some friends to shoot in their backyard and gathered some props from them too. There was no editing that I required for the images because I felt that the lighting and colors did not need any special adjustments. The filming had very few rough patches and went along smoothly, as we kept bouncing ideas off of each other. The idea for the chase scene was not originally planned, but after shooting it we felt that it was much better that way. The only other problem that I had was that my camera did not have a fast shutter speed for action shots, and this made me adjust plans because all of the characters had to move as if they were in slow motion to get the action captured as intended.Original: Edited:
Hyper-Realism:
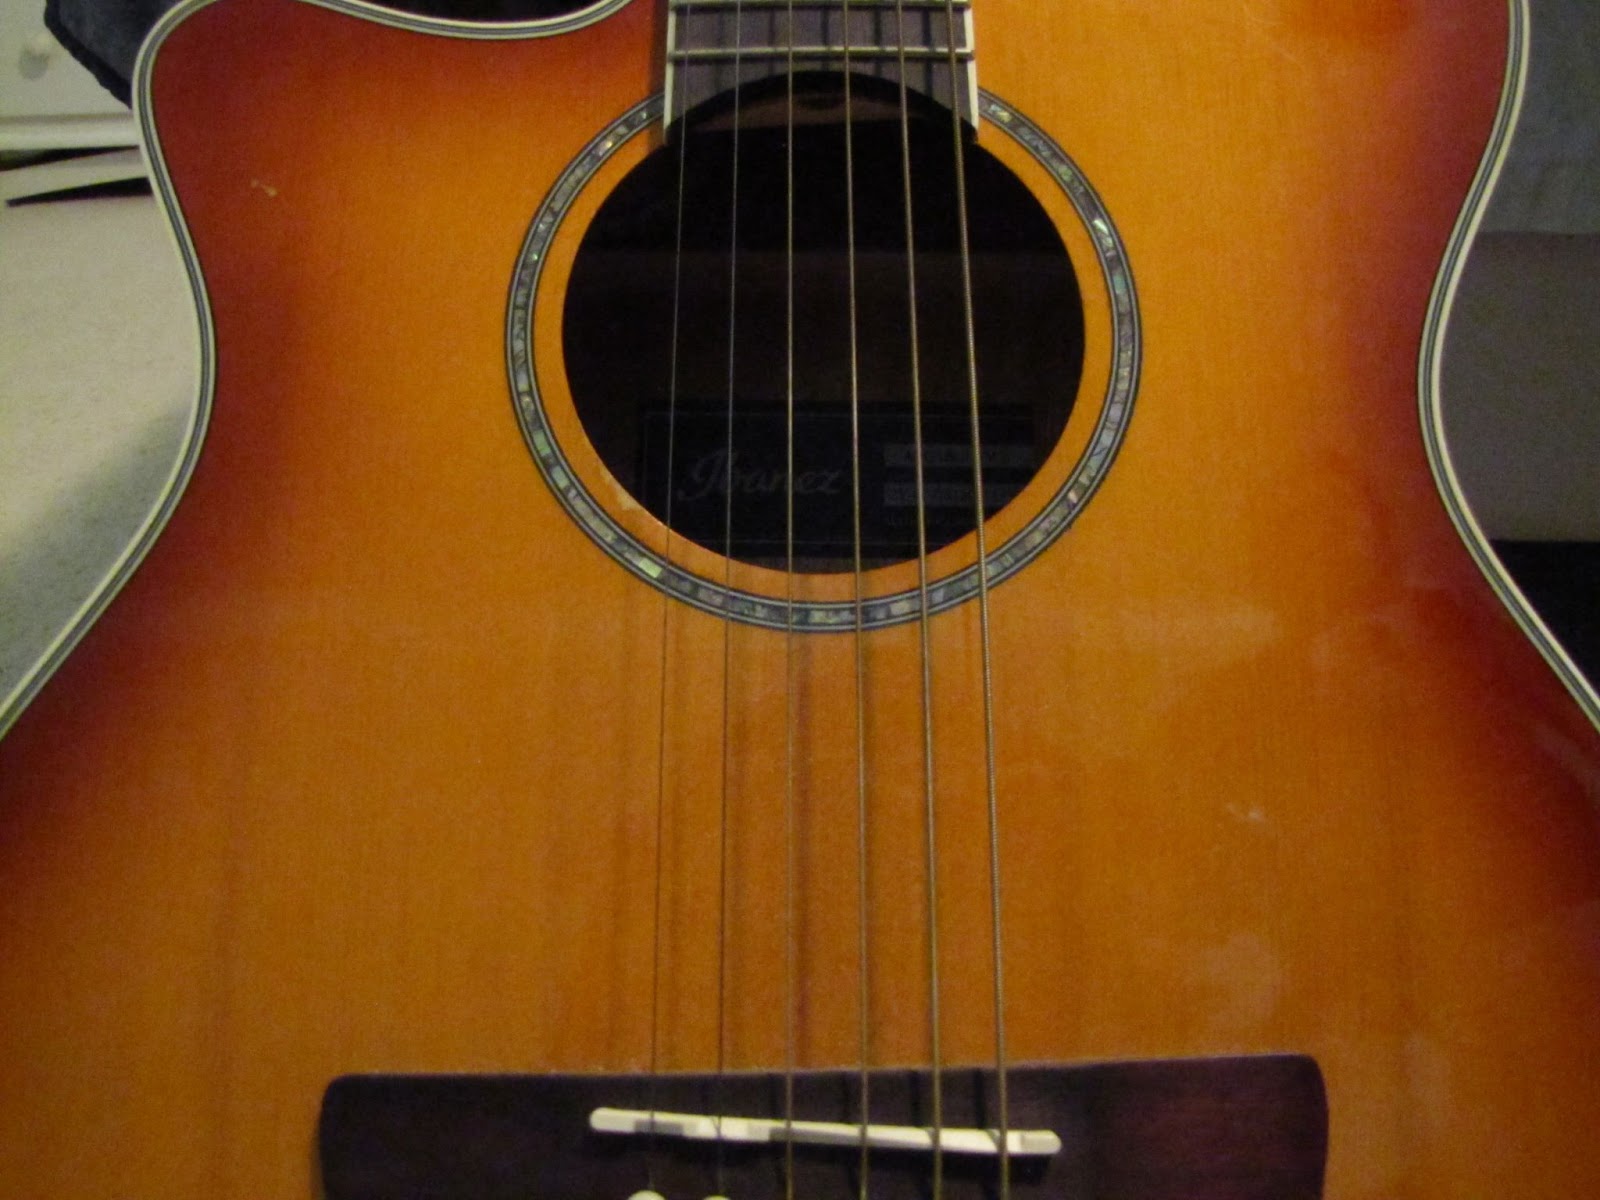
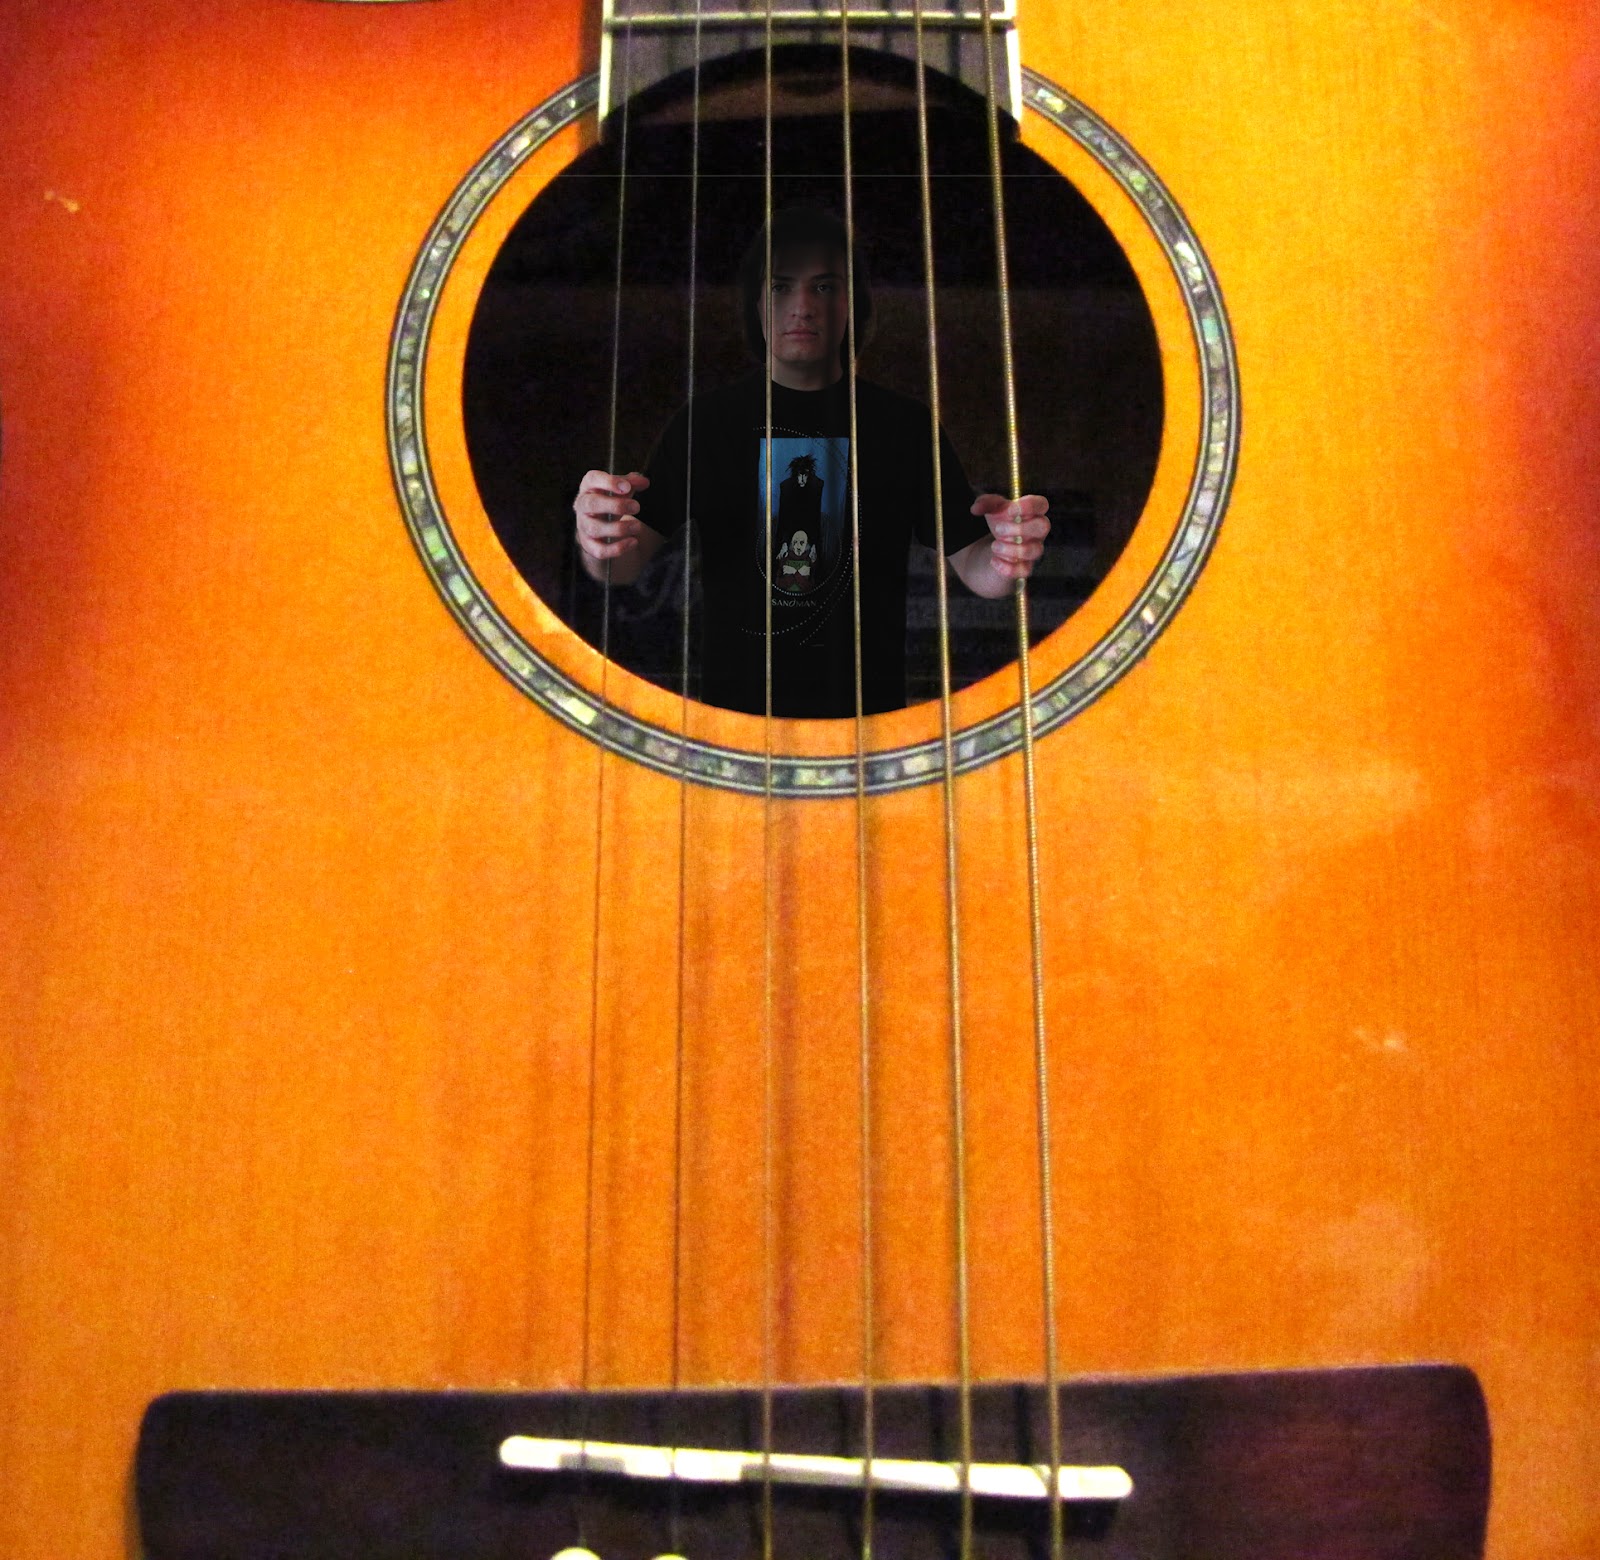
To start my project I came up with multiple ideas and having a person trapped in a guitar seemed the most achievable and also the idea liked the most. The only resource I needed was the guitar which was supplied by the model. To achieve the picture I set up the guitar and model at the same angle for their pictures so the lighting would be consistent. The only difference was darkening it for the model to replicate the feeling of being inside the guitar. I then brought both of the images into photoshop to combine them, adding additional shadows on the model such as the strings and the shadow of the soundhole. I also removed the background and softened the edges to make them fit more naturally into the scene. The use of levels layers, saturation, contrast, and curves layers helped define all of the shadows and colors effectively and in my opinion, brought the image to life. The main struggle I had was making the strings look like they fit properly into my model’s hands.
Original: Edited:
Portrait:
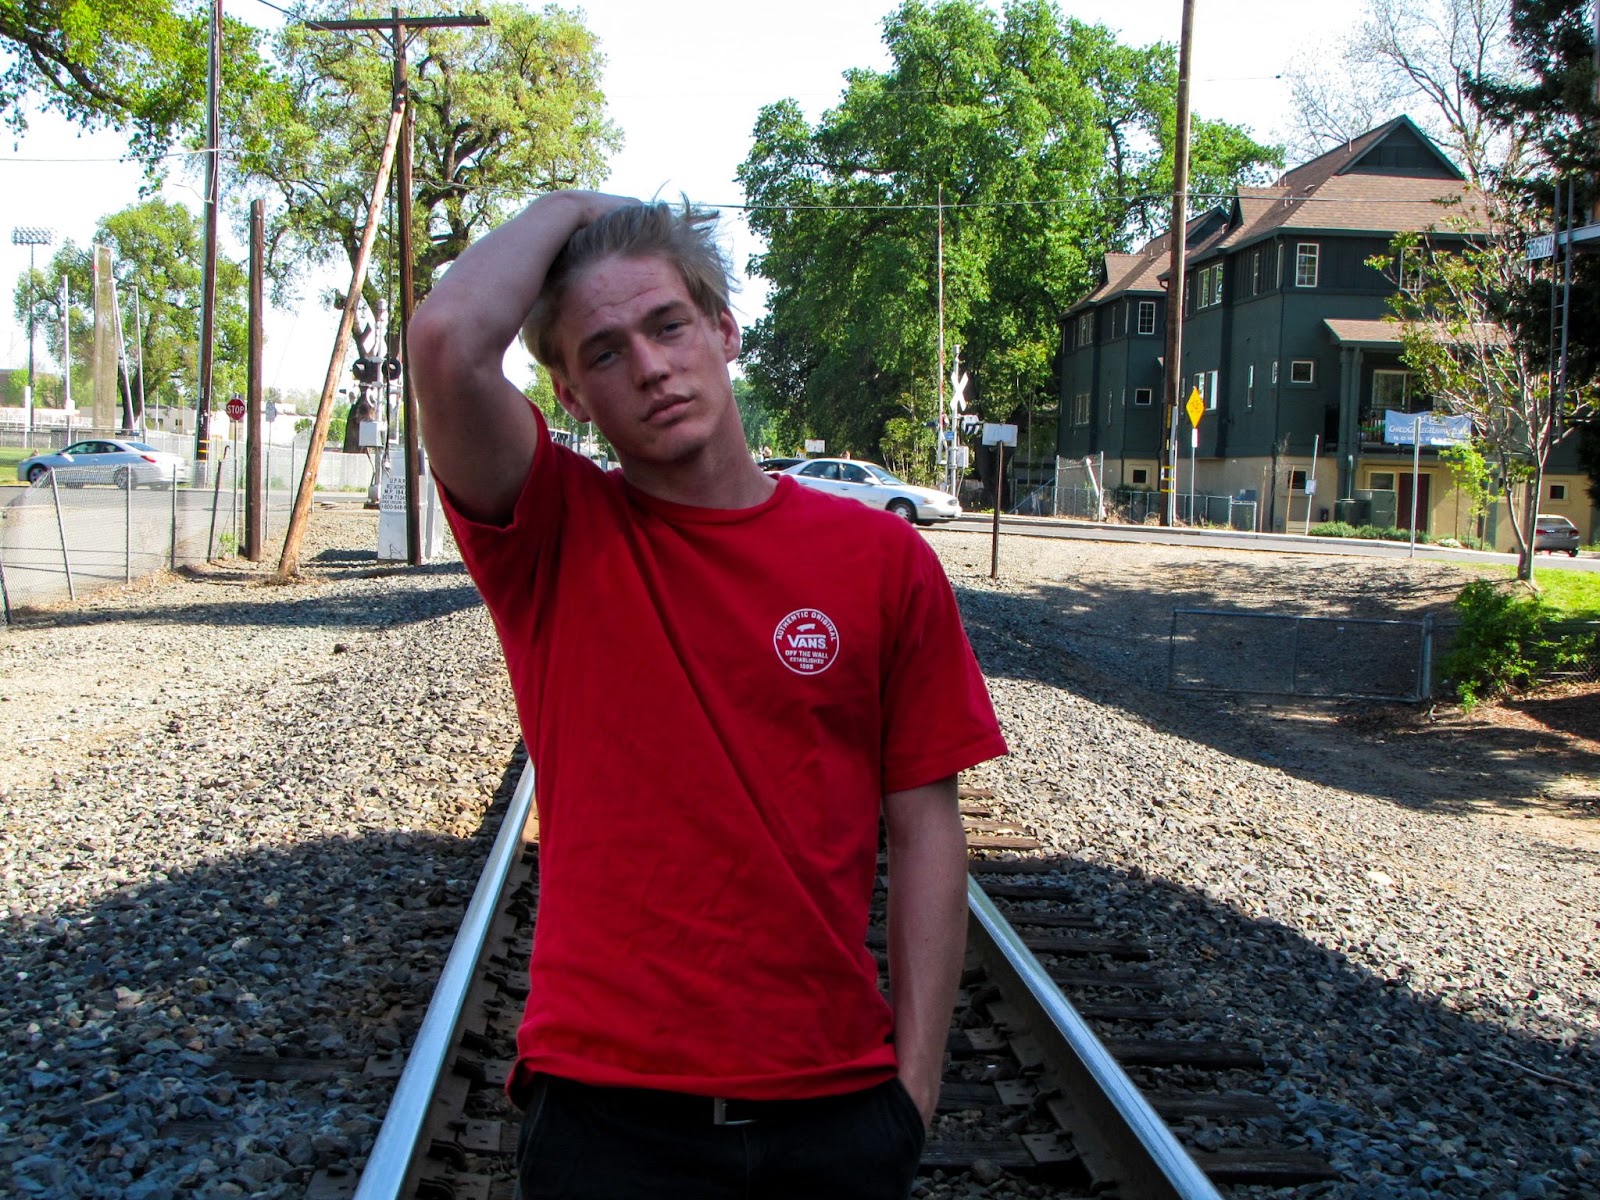
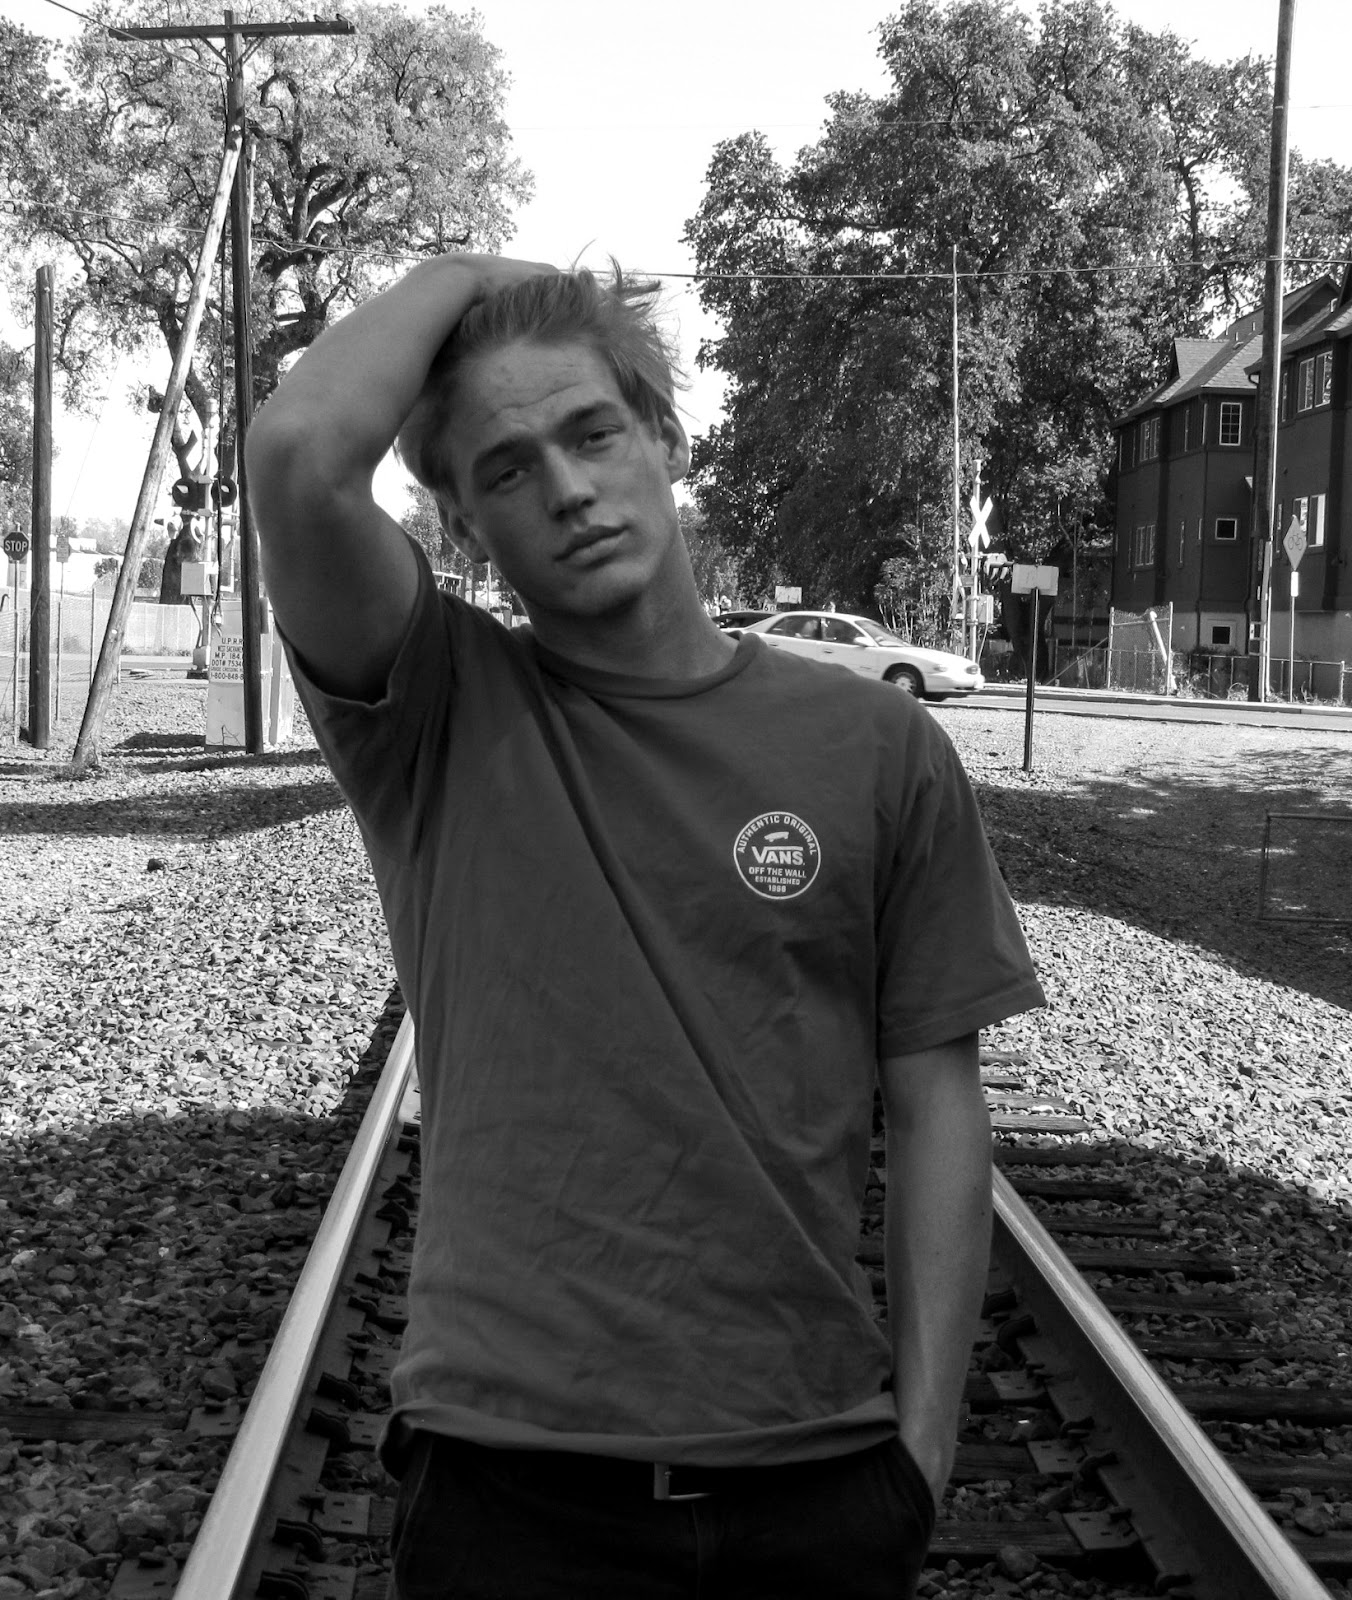
For the Portrait assignment, I used the train tracks near my apartment and took the pictures on top of them to have leading lines towards the model. We also took photos against a fence with plants growing around it, however, the railroad picture felt more suiting. My main focus with the composition was to use the leading lines to bring attention to the model who has lots of contrast against the light background. I felt that the angle that the sun was at was perfect for how I wanted the contrast to be, however it was the same time many cars were driving on the road behind the subject that I was not able to remove due to their position in the background. The only source of light in the photo was the sun but the trees that blocked it filters the light to help highlight the subject while still being in the shadow. I used a black and white layer, curves and saturation layers, and a levels layer to get the lighting how I wanted it to be.

Panorama:
For the Panorama assignment, I walked over to the Chico State campus and took my picture from the gardens. I created a 4 image long HDR photo for my main panorama photo, and I wanted to use the HDR because of the extra depth it gave to the panorama. My composition was mainly intended to highlight the bell tower that we have on campus and to show the flowers that are growing, however, the flowers weren’t as fully bloomed due to the winter. I slightly used the rule of thirds in my composition with the position of the tower. I chose the tower to be my subject because while walking through the campus searching for a good image the bell rang and gave me the idea. I do think that the panorama curve helps guide the viewer’s eye along the path, but the trees also help frame the image and tower. I did have some problems with ghosting after the photos were merged, but with the use of the content-aware fill and stamp tool, I was able to remove most of it. I used a levels layer to help enhance the shadows and used a vibrance layer to make the colors pop more.
HDRI:
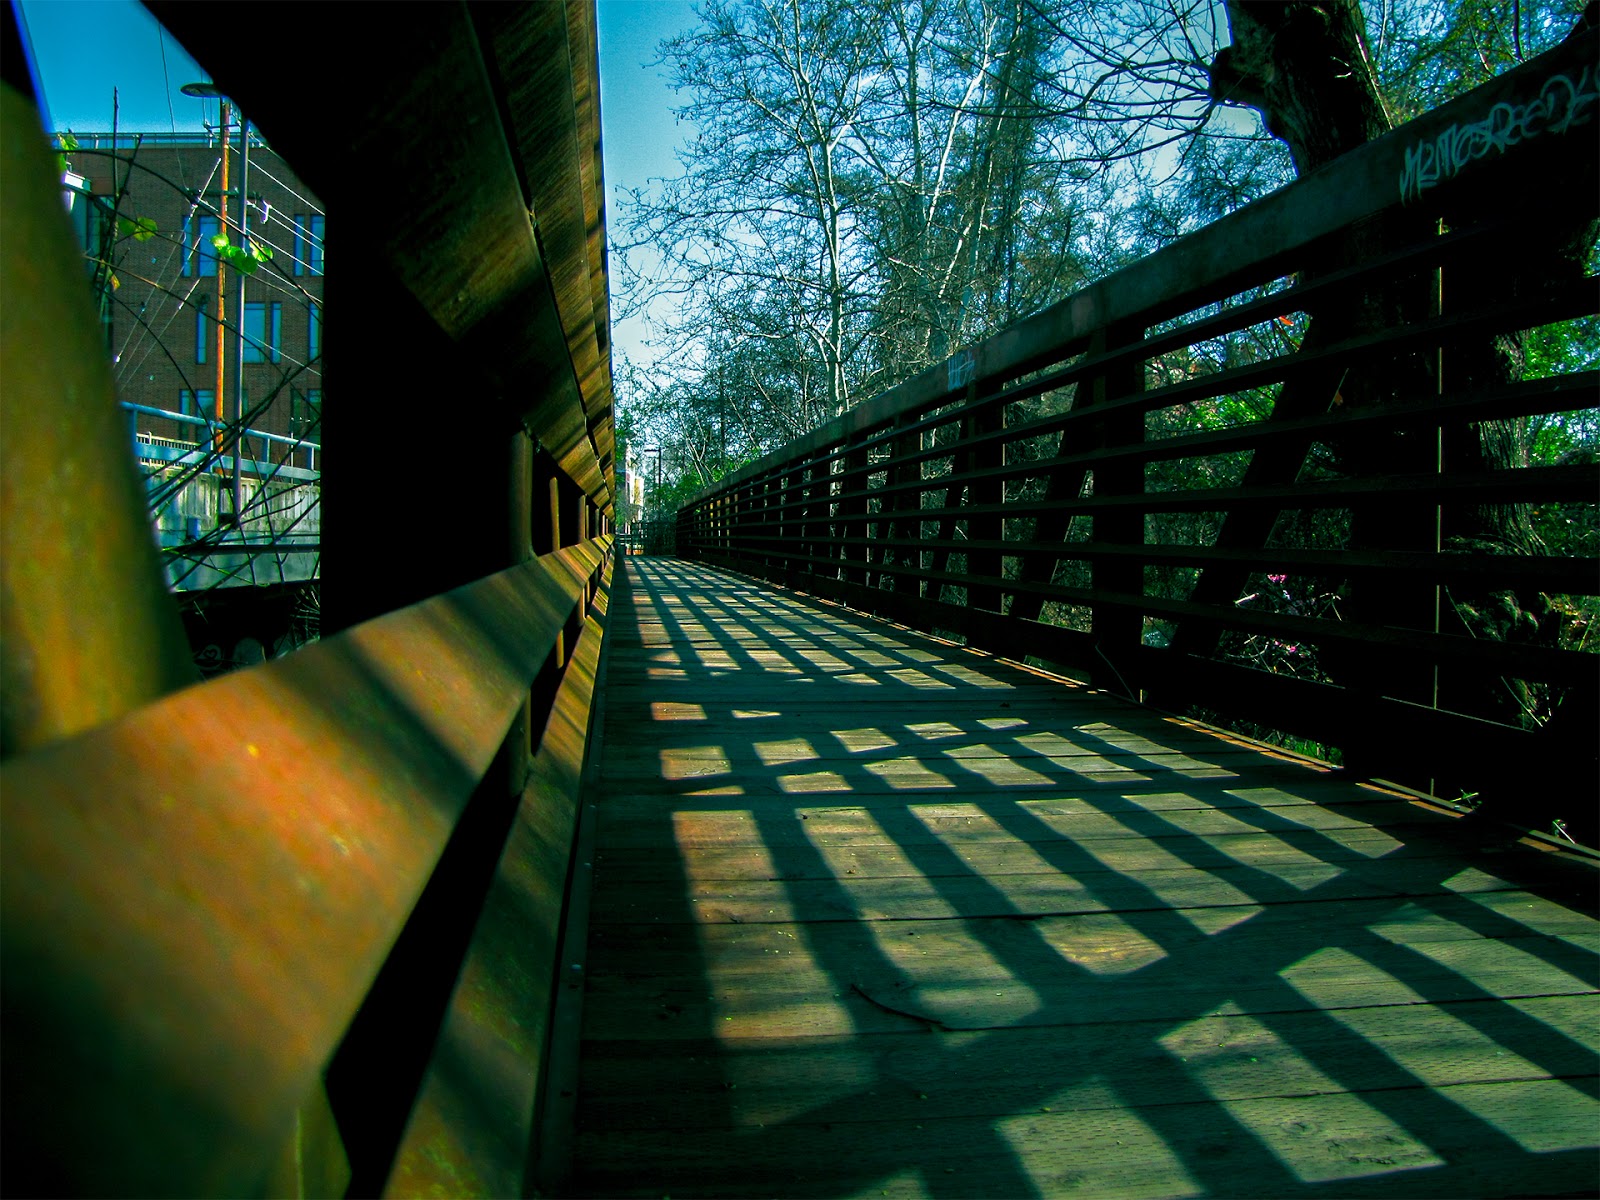
For the HDRI assignment, we were tasked with using the bracketing function on our cameras to take photos that are at different exposure settings of the same image. I did my HRDI using 3 separate exposure settings, doing more would be difficult because I don’t own a stabilizer yet. The subject I used for my composition was a bridge along the path I usually walk for discovering pictures to take, the way the sun was positioned gave the bridge many different shadows from the bridge itself to the trees overhead. Using a mix of the rule of thirds and lead lines to help lead the viewers’ eyes around the picture. I feel that the framing that the bridge causes helps capture the perspective I was intending, and the shadows that were enhanced by the HRDI give much more depth throughout everything. I used a hue shift to give it a more rustic feel, and a levels layer to emphasize the shadows.

Things:
For the things associated, the goal was to learn and use depth of field in our images. This was also where we were taught about using saturation and color layers to help enhance the image. It was much more simple to find a subject for this assignment due to how many common household items can be made to look very nice if shot correctly. I took many different images with different f-stops and exposures but decided on the pencil cup because of the vibrant background. For the edits I did, I used a levels layer to bring up some of the shadows and then used hue and saturation layers to make the tips of the two focal points stand out while being almost clear. I think the vibrant colors of the background were able to act as subtle guides that bring the viewer’s eye to the only things that are in focus.

On The Edge:
The on the edge was a very fun intro assignment. The class was meant to make the focal point of their image on or close to the edge of the frame and to turn the image to black and white. I did not know too much about camera settings when this assignment was assigned so I had the camera on auto settings, and adjusted the f-stop slightly for focus. I took my camera on a walk, taking pictures of whatever caught my eye, while downtown, I noticed the stoplight and took the picture. In photoshop I used a filter layer to bring the image to black and white, while still keeping the colored photo underneath. There was another layer used to enhance the whites and darken the darks before we learned to use HDRI’s by using a masking layer and fading the whites through the layer behind. Enhancing the sky helped define the difference between the subject and background. I also used a levels layer to help bring the shadows up, because the buildings in the back were slightly too dark.
Comments
Post a Comment