CAGD 230 Eportfolio
Final
Week 1
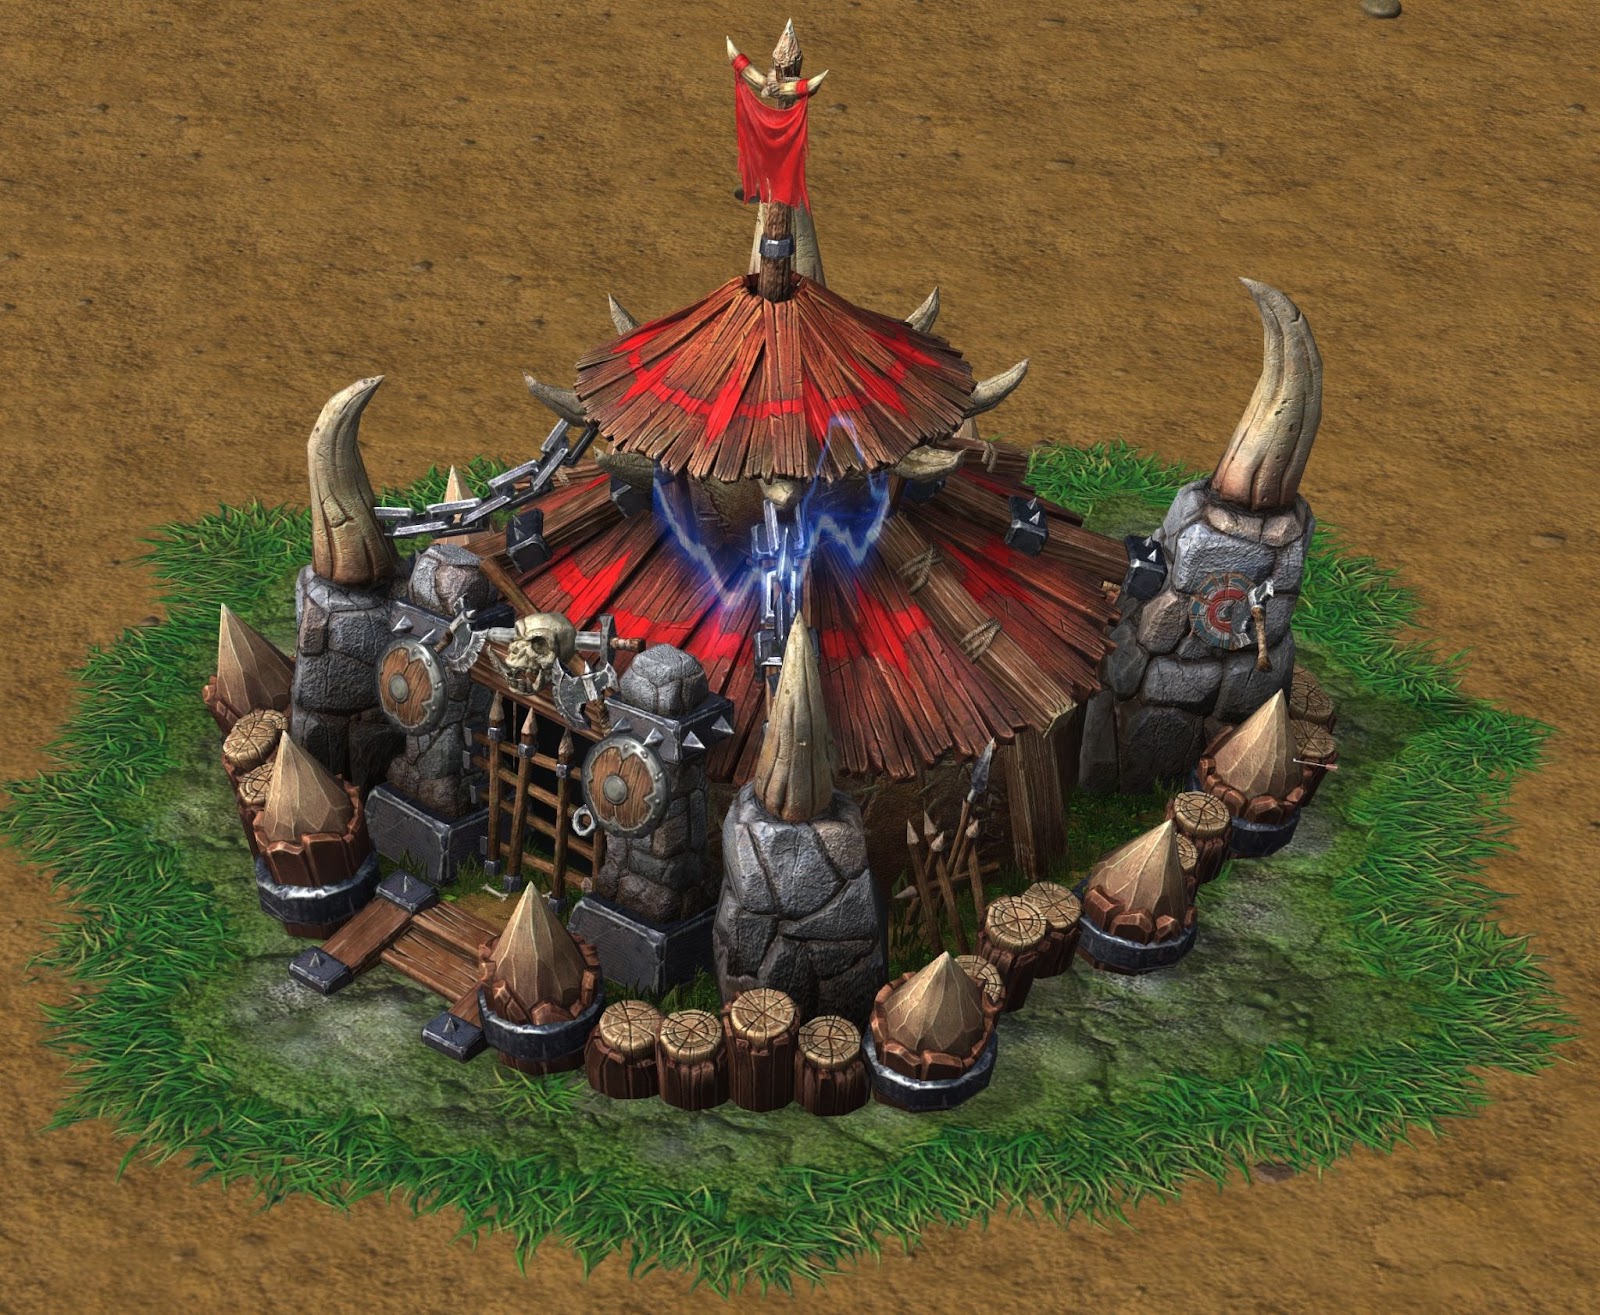
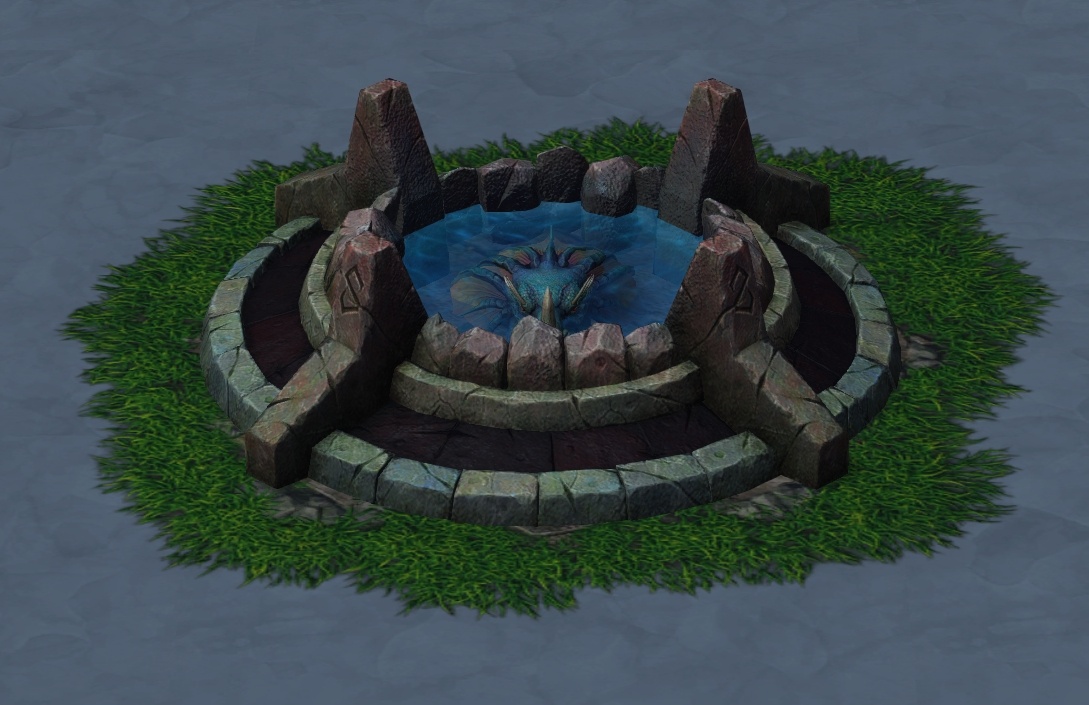
For the first week of our project it was mainly to find the concepts of our project that we would be modeling modularly. I decided on a few pieces from the Horde in Warcraft 2, Mainly because I liked their architecture and uses of rough wood and spikes. I also chose a fountain from a different faction that I don't know the name of, but I enjoyed the design. The most difficult part of the models I expected to encounter was modeling the roof.
Week 3
This was the week where I did the majority of my modeling and taking on the largest and most detailed piece of my project, the main hut. I learned many ways to make the process much easier than I expected. The roof, which had me very worried, was fairly simple after modeling a few panels, inserting a bend deformer allowed me to pinch them to fit being a ring shape. I then set the pivot point to the middle of the model and duplicated the planks around to test if it worked. After testing I undid the duplicates and UV’d the planks to make the duplicates share the same UV’s. The second problem I encountered was the flag, which didn’t become too hard after adding many edge loops and deforming with the soft select tool.
After finishing the model and creating an ID map I moved to substance painter to texture the model. The process went fairly quickly after searching for some textures that I didn’t have at the time for the bones and cloth.
Week 4
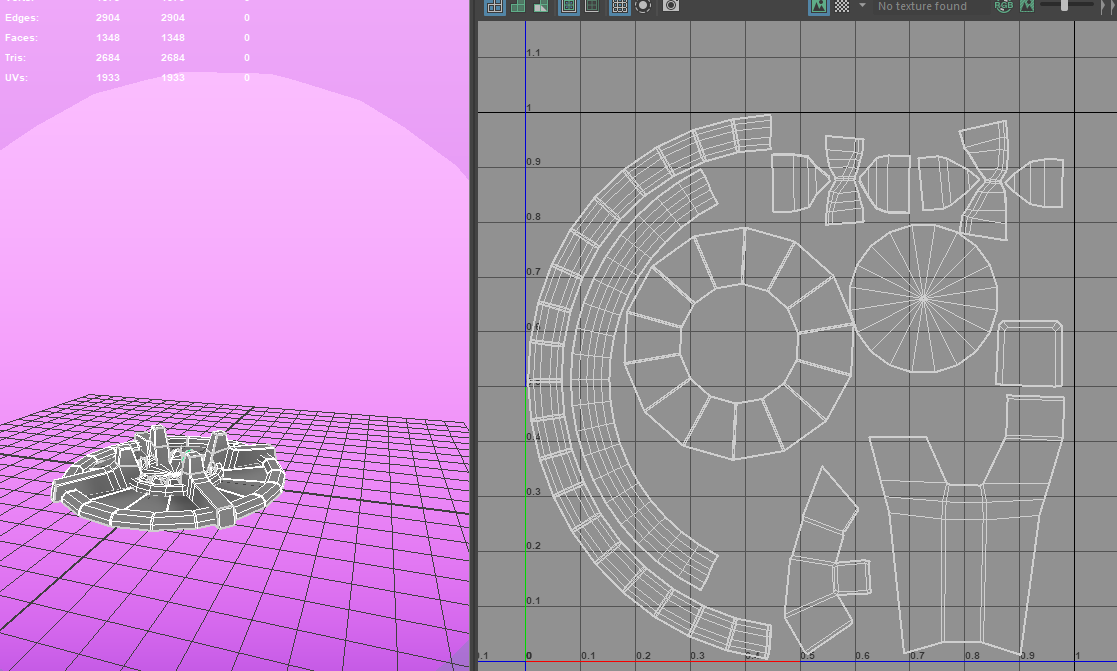
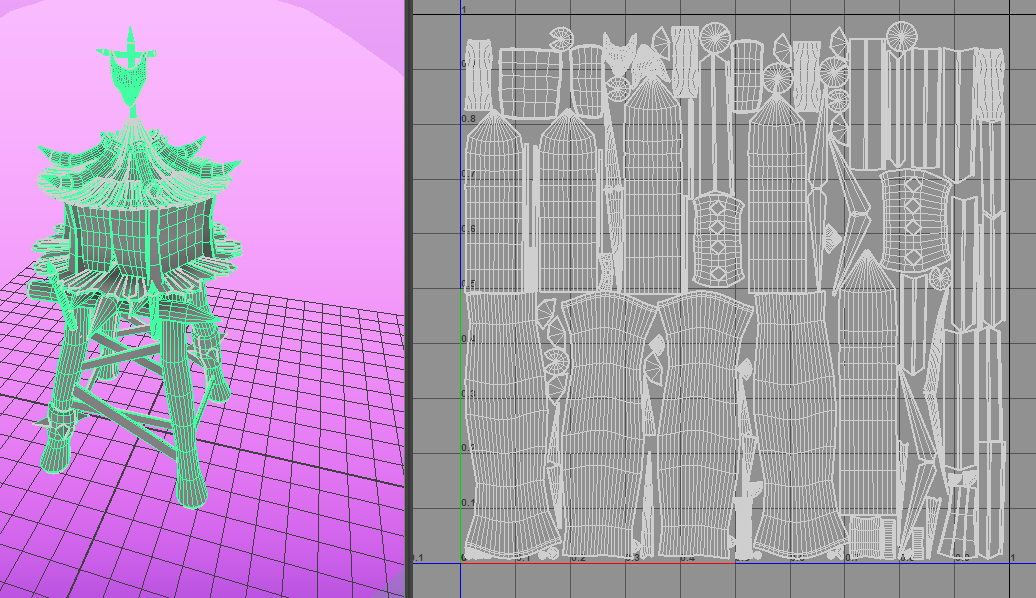
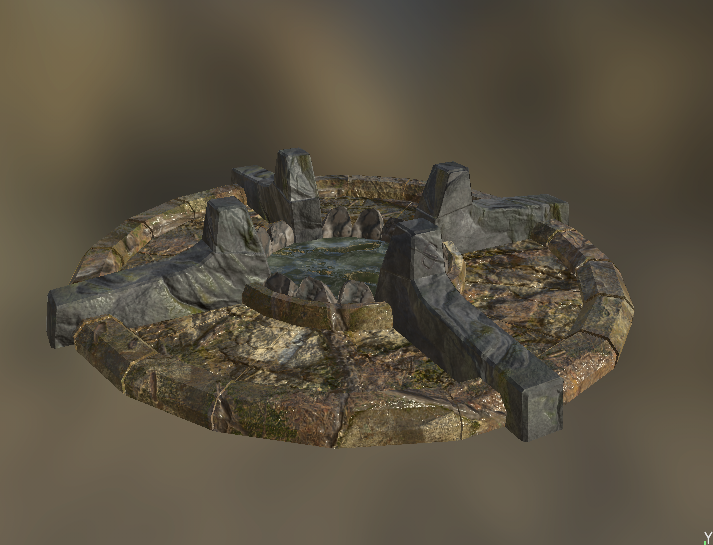
This week I made my second building and my prop, the tower I made used many of the same techniques from the hut. I used those same techniques for the floor, roof, and flag. The fountain was most likely the easiest piece of my model because it had the least amount of detail required in the model, the main detail applied was through substance painter.
Week 5 Final Post
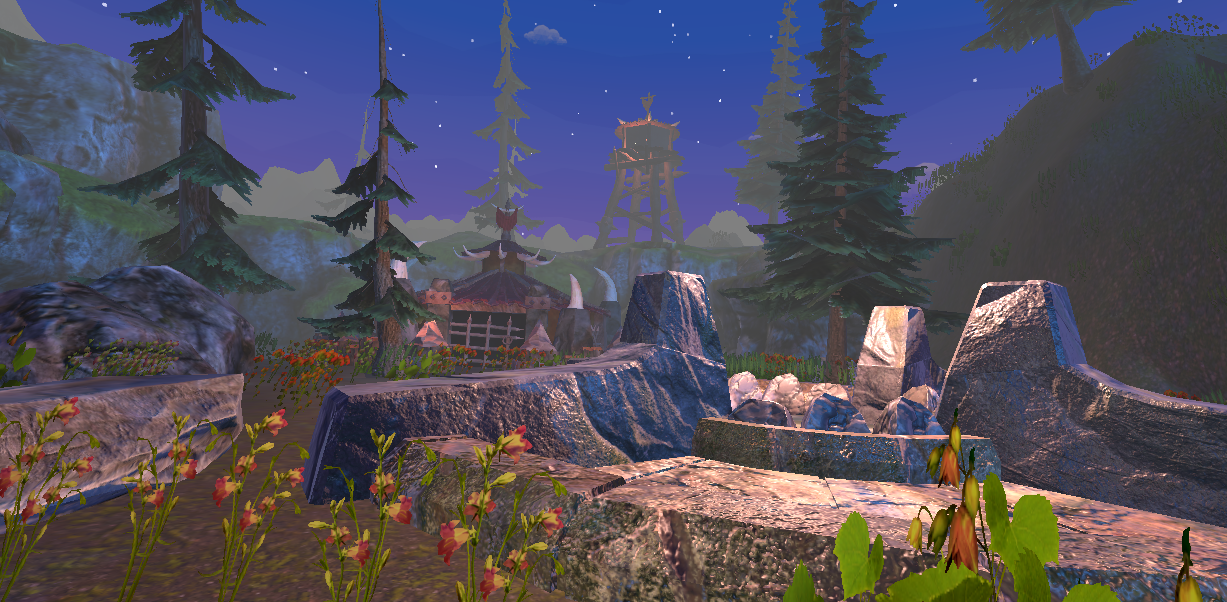
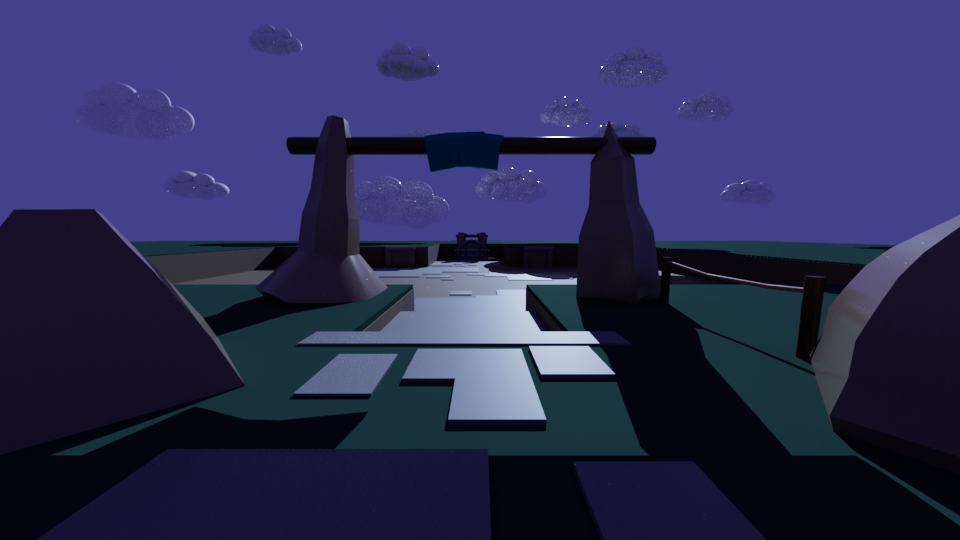
This week I finished up any issues I had with models and then prepared them for Unity. Once I imported the models into unity I noticed one was wrong so I had to go back to Maya and fix it with the scale tool. I then decided to browse the unity store for some free assets to bring into my scene, like trees, flowers, ground textures, skyboxes, and environmental pieces. I first imported my objects into unity and created the materials for them before doing any terrain work. I then started testing the terrain tools to figure out the best ways to make an environment with the environment sculpt tools. Adding textures to the ground and placing environment pieces like cliffs, trees and rocks around the scene. I then proceeded to light my scene and decided to make it dark due to the skybox I chose being a night sky. Adding fog and post processing was the last step of my scene before importing the player controller.
Room
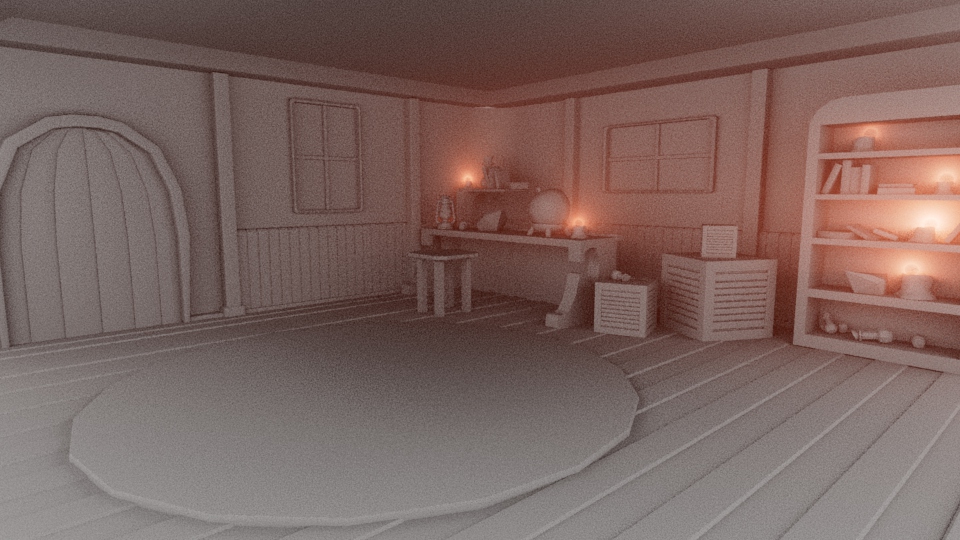
For this room assignment we were tasked with creating, UV-ing, texturing, and lighting a room of our choice. The room with everything had to be around fifty thousand faces total, so we had to use our skills to increase or lower the face count. I loved the open-endedness of this project because it allowed us to explore our creativity while also applying all of the skills that we have learned in class. Some of the main problems that I experienced was trying to manipulate the scene while having the lighting on to make sure everything was correct. I also had the scene scaled up very large which caused rendering to take much more time than required. After I had everything textured I grouped the project to scale it down to a reasonable size without affecting the actual scale of the room. I feel as if when I started the project I was a bit behind because I set time for other classes first, so if I started the project when it was intended I could have saved myself from much unneeded stress.
Chess Board

For the chess board, we had to make a table for the board as well as the board and pieces ourselves. Including the modeling we had to create UV maps and textures for each object. The pieces were mainly very simple, because most chess pieces are round; they can be created with the Curve and Revolve tools. The only exception was the knight, which was the most difficult to model. I ran into many issues while trying to create the knight, one of the more common ones I experienced was a face hiding inside of the model causing either Ngons or breaking the UV Map. It was an easy fix once I figured it out by just zooming inside and finding the hidden faces and easily deleting them.
Props Assignment
In the props assignment we were tasked with creating a lantern, potion bottle, glass, bucket and flour sack. Each Item was to be created individually in its own scene and then exported and combined into one main scene. The project went off with relatively no issues other than running out of time. I did not allocate enough time to myself to finish this project so I was unable to create the flour sack. If I had given myself more time for the assignment I feel as if I could have made the flour sack and made everything more detailed.
Barrel Assignment
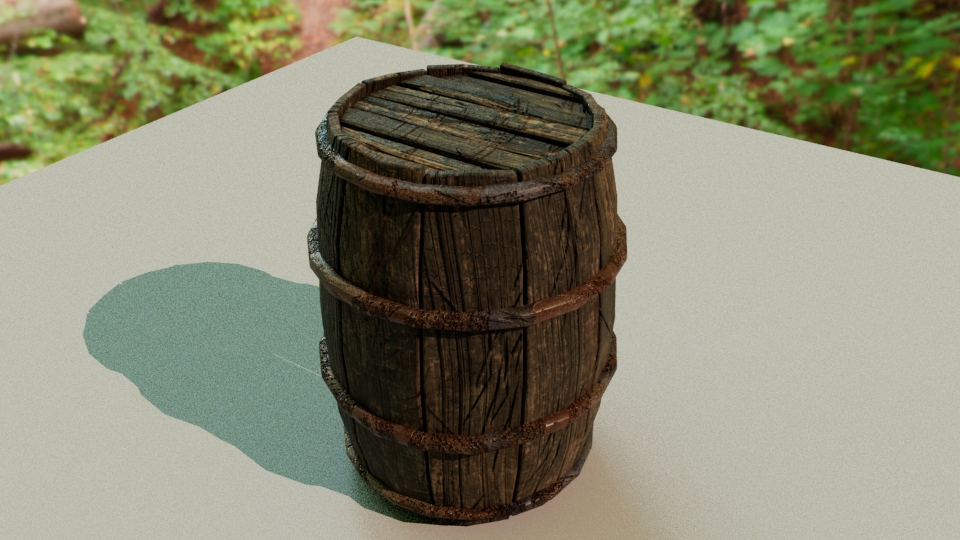
The barrel assignment was our first lesson in learning to use substance painter and creating UV maps. We learned to use texturing for making an object seem as if it has more polygons than it does with bump mapping.
This was a very simple project that taught many different tools in Maya such as distortion mesh and using the bevel and extrude tool more frequently. There were very few Issues that I ran into while creating the barrel and I finished a day or two before the due date, so I did not have much to improve on my work ethic I feel. With the tools that I have learned later in class I feel as if I can make a much more detailed barrel.
Primitives Assignment
For the primitives assignment we were assigned to create a scene while only using shapes provided to us by the Maya Software itself. We could stretch the objects, but adding edges or extruding was not allowed. The texturing could only be done with default lambert textures with recoloring. This assignment gave us free reign to create whatever scene we wanted, however using only primitive shapes limited our detailing. The main challenges I faced was creating a proper perspective with the reference I used and also creating the rocks at the entrance. The rocks were created using super shapes, and the perspective was done by just working on the scene until it felt correct.

Week 3


Week 4
Week 5 Final Post


Comments
Post a Comment